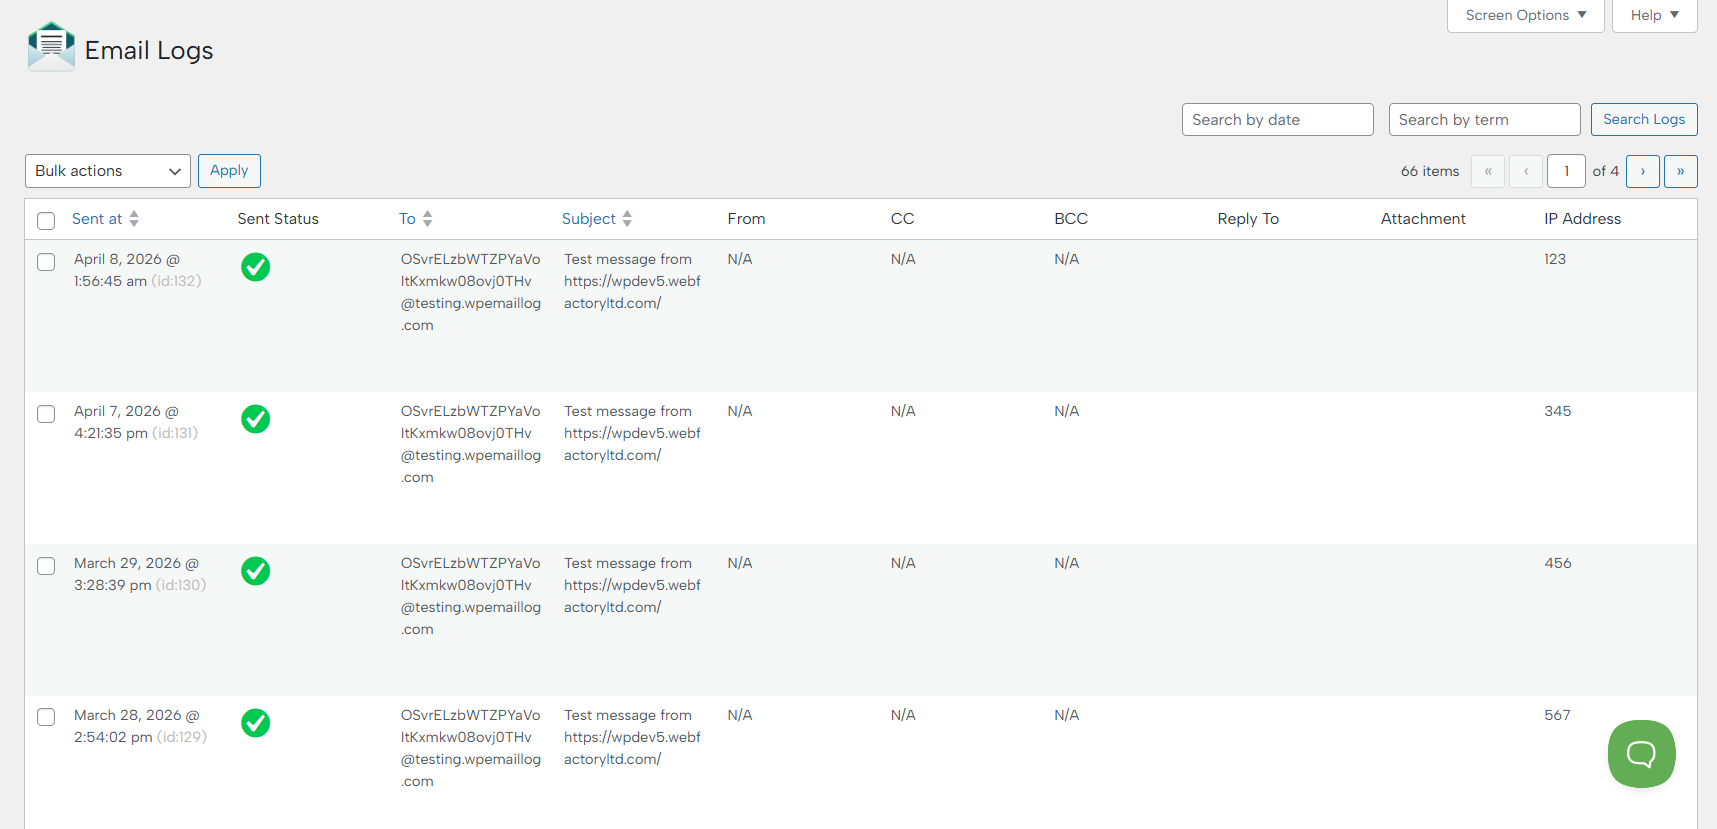
The Email Logs feature provides a complete overview of all emails sent from your WordPress website. It helps you monitor delivery, troubleshoot issues, and maintain full visibility over outgoing communications.
Without proper logging, it’s difficult to know whether emails are actually being sent from your site. The Email Logs feature removes that uncertainty by giving you full transparency and control over your email system.
Overview
Inside the Email Logs screen, every email is recorded with essential details, including:
- Sent At – The exact date and time the email was sent
- Sent Status – Indicates whether the email was successfully delivered
- To – The recipient’s email address
- Subject – The subject line of the email
- From – The sender information (if available)
- CC / BCC – Carbon copy and blind carbon copy recipients
- Reply-To – Reply address (if set)
- Attachment – Displays if attachments were included
- IP Address – The originating IP address from which the email was triggered
This structured layout makes it easy to quickly scan and verify email activity.
Key Features
Delivery Status Tracking
Each email includes a clear status indicator, allowing you to instantly confirm whether it was successfully sent or if any issues occurred.
Search & Filtering
Quickly locate specific emails using:
- Search by date
- Search by keyword (recipient, subject, etc.)
This is especially useful for debugging or auditing email history.
Pagination
Large volumes of logs are organized into pages, ensuring fast performance and easy navigation even on high-traffic websites.
Bulk Actions
Select multiple email logs and apply bulk actions for efficient management, such as:
- Delete
- Delete All Logs
- Export
- Export All Logs
- Resend Email
- Resend All Emails
You simply select the specific action and press the Apply button, which will trigger the selected action.
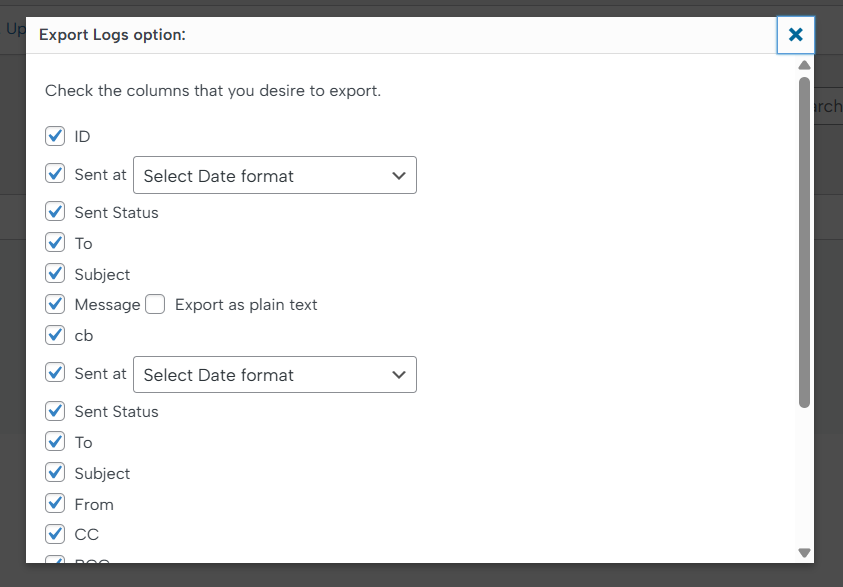
One of the most useful options is the ‘Export Logs’, which allows you to download your email records in a structured format for reporting, debugging, or backup purposes.
How to Export Logs
- Navigate to WP Email Log > Email Logs in your WordPress dashboard.
- Click the Export Logs button.
- A pop-up window (as shown in the screenshot) will appear.
- Select the fields (columns) you want to include in the export.
- Choose your preferred date format where applicable.
- Click Export to download the file.
Available Export Fields
You can customize your export by selecting any of the following fields:
- ID – Unique identifier for each email log entry.
- Sent at – The exact date and time the email was sent (with selectable format).
- Sent Status – Indicates whether the email was successfully sent or failed.
- To – Recipient email address.
- From – Sender email address.
- Subject – Email subject line.
- Message – Full email content.
- Option: Enable Export as plain text to remove HTML formatting.
- CC / BCC – Carbon copy and blind carbon copy recipients.
- CB (Callback/Custom field) – Additional metadata depending on your configuration.
Date Format Selection
For fields like Sent at, you can choose a date format that best fits your reporting needs. This ensures compatibility with spreadsheets or regional formatting preferences.
Tips for Best Use
- For debugging: Include Sent Status, Message, and To fields.
- For reporting: Use ID, Sent at, Subject, and Status.
- For clean data analysis: Enable plain text export to avoid HTML clutter.
Export Output
- Logs are typically exported in a CSV format, making them easy to open in tools like Excel or Google Sheets.
- The exported file will include only the columns you selected.
Use Cases
- Troubleshooting email delivery issues
- Verifying form submissions and notifications
- Auditing outgoing emails for compliance or tracking
- Monitoring suspicious or unexpected email activity